2006年4月27日
Coffee Geek
I can still remember the first sip of my coffee. It was a cup of freshly ground and brewed coffee. Since then, I fell in love with it. However, the first taste was so good, I then couldn't find any coffee as good as that.
When I was old enough, I started going to Starbucks with friends, leaving MacDonald behind. However, paying that much money, most of the time I prefer MacDonald's coffee to Starbucks'. Because in MacDonald I am only paying what the coffee is worth but not an overpriced crap coffee.
I constantly get disappointed with Cappuccino. It's either too bitter or too cool. It's so obvious that those so-called coffee enthusiasts do not warm the mug up, put too much espresso and the milk is probably not steamed. So I avoid having Cappuccino at coffee places, only have a Mocha or hot chocolate all the time. At least these are sweet; I don’t think there is much can go wrong in them.
NOW, I have started making my own coffee. I am a complete beginner in coffee making but I am getting more and more into it.
The bad thing about this is not only the caffeine but also the money you can spend on it.
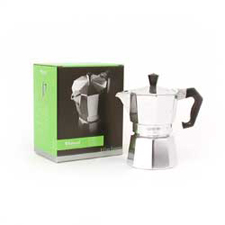
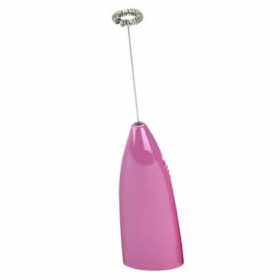
I started off buying a cafetiere; then a coffee grinder and on the weekend I bought an espresso pot and got a free milk frother off a food magazine. (The milk frother is PINK!) I haven't really spent that much money on coffee making but you can spend some serious money if you are really fussy about it.
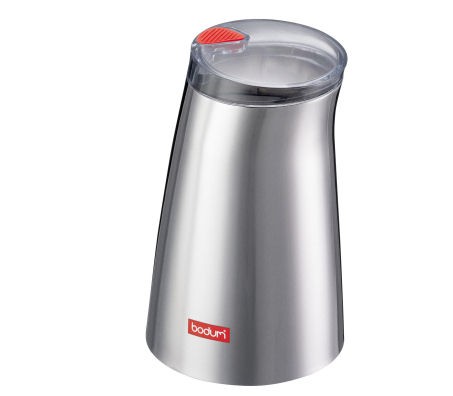
I have got a Bodum made coffee grinder. I bought it just because it was cheap, only £10. Most reviews I have read recommended burr because it gives a more uniform grind of the beans. This is very true. The Bodum one I have got is a blade one, the grind of the beans really is not uniform. But I think this is something I can live with because I am only using a cafetiere.
Having made freshly ground and brewed everyday coffee, I am now up for another challenge: making fresh Cappuccino and Latte. These coffee variations are espresso based. Supposedly espresso can be made by using a cafetiere. However, I wanted to go for a more authentic way. So I bought an espresso pot.
Problem starts here. Without one of those fancy espresso & cappuccino maker, I cannot steam and froth the milk by using pressure. All I can do is to use a milk pan to heat up the milk and use my freebie to froth it. I haven’t tried making it but I hope it will go well or I can just sell them on on ebay. LOL
標籤:
生活逸事

2006年4月23日
龍蒿草奶油菠菜雞肉寬扁麵
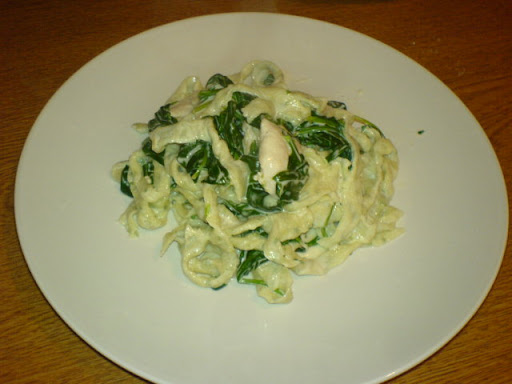 這個寬扁麵非常容易做,吃起來口感味道都跟餐廳的沒什麼分別。不是賣花讚花香,我吃了一口就禁不住像伙頭智多星裡的味皇一樣大叫「好美味啊!」,幼滑的鮮忌廉加上蒜頭的香味,嗯……!吃嫌了肉醬意粉不妨試做過個!
食譜改寫自BBC food
材料﹕
這個寬扁麵非常容易做,吃起來口感味道都跟餐廳的沒什麼分別。不是賣花讚花香,我吃了一口就禁不住像伙頭智多星裡的味皇一樣大叫「好美味啊!」,幼滑的鮮忌廉加上蒜頭的香味,嗯……!吃嫌了肉醬意粉不妨試做過個!
食譜改寫自BBC food
材料﹕
- 寬扁麵 225g
- 雞胸肉...1塊,切厚片(大概1-1.5cm)
- 菠菜...隨意
- 蒜頭...2瓣,剁成蓉
- 鮮忌廉(single cream)...150ml
- 新鮮龍蒿草葉(tarragon)...切碎,3湯匙
- 燒開滾水,將寬扁麵放進大滾水內煮 8-10 分鐘
- 同一時間用中火預熱煎鍋,放少許油,待油熱後放入蒜蓉炒香
- 蒜蓉炒至輕微轉色便放入雞胸肉片,將肉片兩邊煎封(顏色轉成白色或微黃色),小心繼續炒拌蒜蓉,不然會燒焦啊!
- 將鮮忌廉及3湯匙水倒入雞肉及蒜蓉中,將火收慢,用中慢火慢慢煮醬汁
- 當寬扁麵煮熟後,將菠菜放入煮麵的鍋中,然後立刻一同隔水瀝乾待用。(由於菠菜遇熱即熟,一放進煮麵的熱水中就立刻煮熟)
- 待醬汁滾熱後,放入適量鹽及胡椒調味,將適量醬汁及所有雞肉倒入已煮熟的麵中,拌勻,即成。
- 醬汁不要一次過全部倒到麵中,醬汁該剛剛足夠包住每一條麵﹔而不是一團麵在一淌醬汁中游泳
- 原食譜中雞肉和醬汁是分開煮的,我不想洗碗的時候洗這麼多,所以將步驟稍作改動,可以用一個鍋就煮好雞肉及醬汁
- 原食譜中沒有炒香蒜蓉這個步驟,但我覺得炒香了的蒜蓉給醬汁一點淡淡的蒜香及味道,醬汁味道更佳
- 在網路上找到很多Tarragon不同的譯名,要買的話還是按英文名字買吧
- 買不到Tarragon,可用歐芹(Parsley)或蒔蘿草 (Dill) 代替,但我個人認為不要將蒔蘿草放進醬汁裡面煮,切碎,上碟後才灑在寬扁麵上會較好 (我沒有試過,只是直覺上的建議)
- 買不到新鮮的,用乾燥的也可以啊
- 圖片中的麵是我自己手打的菠菜寬扁麵,所以是綠色
2006年4月19日
大學生涯的味道 — 吞拿魚包
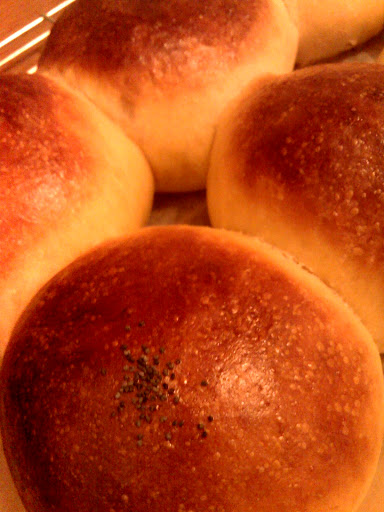 最初想要做麵包的原因是在英國沒有多樣式多口味的麵包,在香港不同形狀不同餡料及不同國藉的麵包,應有盡有。記得小時候非常愛原隻雞腿炸麵包,原隻雞腿外面包住炸得香脆的麵包,那時覺得好新奇﹔中學時愛上了咖哩牛肉炸麵包,每一次自己去麵包店買麵包的話這款麵包是必然選擇﹔在香港上大學的時候則愛上吞拿魚包配維他檸檬茶,幾乎要回去上課的早上,都會到飯堂那裡買一個吞拿魚包和檸檬茶。有日跑到中國舖買了盒維仔檸檬茶,喝著喝著就想起了吞拿魚的味道﹔夠可怕吧,喝檸檬茶會喝出吞拿魚包的味道,哈哈!就因為這樣做起吞拿魚包。
食譜來源﹕為食貓
麵糰材料﹕- 高筋麵粉...225克
- 吉士粉...2湯匙
- 快速乾酵母...1茶匙
- 雞蛋...1隻
- 糖粉...40克
- 清水...120毫升
- 牛油或植物牛油...15克 (室溫)
- 鹽水吞拿魚...1罐
- 沙律醬...2湯匙
- 高筋麵粉、糖粉及酵母倒入大碗拌勻
- 中間撥開一個洞,將雞蛋及牛奶倒入,拌勻﹔倒出至板案上放入牛油,搓揉10分鐘左右成為光滑有彈性麵糰
- 將麵糰放回大碗中,用保鮮紙封好碗口,置溫暖處發酵1小時或至麵糰大小原來的兩倍
- 將麵糰取出測試是否已完成發酵,用手指沾一些麵粉,插進麵糰中抽出,如指洞沒有收縮那就表示發酵完成﹔否則需繼續進行發酵
- 進行翻麵﹕用拳頭輕壓麵糰將裡面的空氣擠出
- 將麵糰從碗中倒出,搓揉2-3分鐘,將麵糰分成6等份
- 將麵糰滾圓,擀薄然後包入餡料,收口向下放在已抹油的焗盤上
- 以同樣手法處理剩餘麵糰
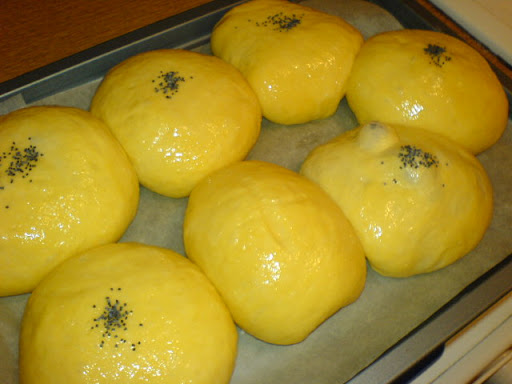
- 用保鮮紙蓋好,於溫暖處靜置60分鐘或至麵糰原來大小的兩倍
- 焗爐預熱200C(最少十分鐘)
- 入爐焗10-15分鐘或至表面轉金黃色
- 出爐至網架放涼30分鐘,入盒儲存
吞拿魚包大特寫﹕看看入面的氣孔組織就知道有多鬆軟,Yum!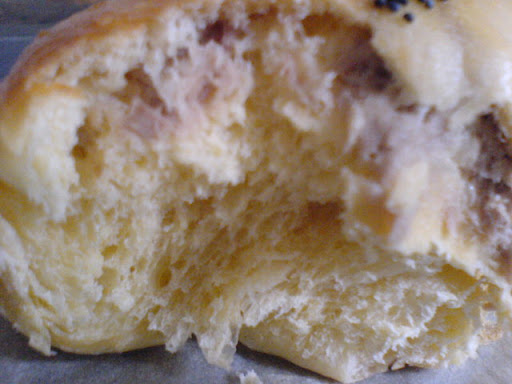
- 可從麵糰材料中留起少許蛋液用作塗包面之用
- 我用的是快速乾酵母(Easy Blend/ Fast Action Dried Yeast),可直接拌入其他乾材料中﹔如使一般乾酵母(Dried Yeast/Active Dried Yeast),則需預先和暖牛奶溶合
- 如麵糰過份濕潤的話,可多加一點麵粉,每一次放1湯匙左右﹔同樣地如麵糰太乾的話,可多放一點牛奶,每一次放1/2茶匙左右
- 我自己現在做麵包時,在第一個部驟不會將全部麵粉倒入,會特意留起1-2湯匙﹔因為我覺得麵糰一旦太乾,即使再加入水份要將麵糰揉至有彈性相當困難﹔所以寧願一開始將麵糰弄得濕潤一點,再逐漸揉入留起的麵粉
訂閱:
文章 (Atom)